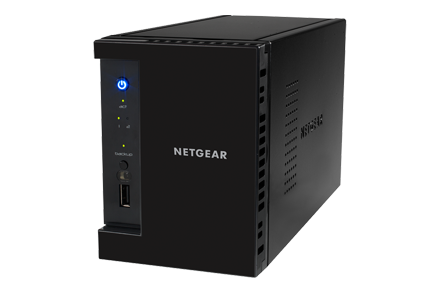
Netgear ReadyNAS
Netgear ReadyNAS is an effective two-bay NAS (Network Attached Storage) device that provides data backups and file sharing over your network. It provides speedy file transfers and enough power to stream audio and videos.The ReadyNAS represents a great combination of speed, comfort, and value. It is divided into two series - they are ReadyNAS Desktop System Series & ReadyNAS Rackmount System Series.
First of all, let us understand the difference between these two series and then we proceed for Netgear ReadyNAS login and setup process.
Netgear ReadyNAS Desktop Series
The Netgear ReadyNAS Desktop Series packs industry-first innovative, unmatched, and convenient top-end online cloud storage devices. Enjoy amazing uncountable snapshots, cloud-managed clone, thin provisioning, and encryption with ReadyNAS Desktop Series.In short, ReadyNAS systems allow you to do more with your important data and files than you have ever imagined. Some of the best ReadyNAS Desktop Models are RN628X, RN626X, RN528X, RN428, and RN428.
Netgear ReadyNAS Rackmount Series
The Netgear ReadyNAS Rackmount Series is the fastest and more secure solution for your small and medium businesses' data. It is an ultimate storage platform with 5 levels of unrivaled data protection. The ReadyNAS Rackmount storage line up with 132-bay capacity with the expansion that offers versatility, performance, and scalability in an easier manner. The most famous ReadyNAS Rackmount models are RN2120, RR2304, RR2304, RR3312, and RR4312X.Now, as you are familiar with the Netgear ReadyNAS Cloud storage series, it is time to move a step ahead towards the ReadyNAS login and setup procedure.
Let's understand the Netgear ReadyNAS setup process.
How to Setup Netgear ReadyNAS?
After you follow these ReadyNAS setup instructions, your device will be ready to use. The setup process takes 15-20 minutes.- 1. Install hard disks that you want to use in your Netgear ReadyNAS.
- 2. Try to place your ReadyNAS system in a ventilated location.
- 3. Connect the power adapter to your system and plug the power cord into an electric outlet.
- 4. Use an Ethernet cable to connect the ReadyNAS system to your home network.
- 5. Press the power button to turn on the ReadyNAS device.
- 6. Visit readycloud netgear.com website on your computer.
- 7. Enter the default login credentials of the Netgear ReadyNAS system. If you are not able to find 8. the ReadyNAS default password, check the user manual.
- 9. Hit on the Discover button.
- 10. Now, click on the Setup button.
- 11. You can set up the ReadyNAS device as per your convenience. You can either set it up as a default ReadyCLOUD system or can choose Offline Installation (Advanced).
- 12. Once the setup process is completed, you can begin to use your ReadyNAS storage system.
Important Note: If your computer is not connected to the Internet, simply download and install the RAIDar utility software. RAIDar application allows you to transfer the downloaded files to a computer on the same LAN as your Netgear ReadyNAS system is connected to.
Read more : How to Reconnect Nighthawk Extender to the Home Network?
Why Does My Nighthawk Extender WiFi Drops Frequently?
Methods to Perform Netgear Router Setup: Guide For Beginners


